Note: Since my original post here got crazy-long, I decided to break these up into smaller, hopefully easier to read, posts.
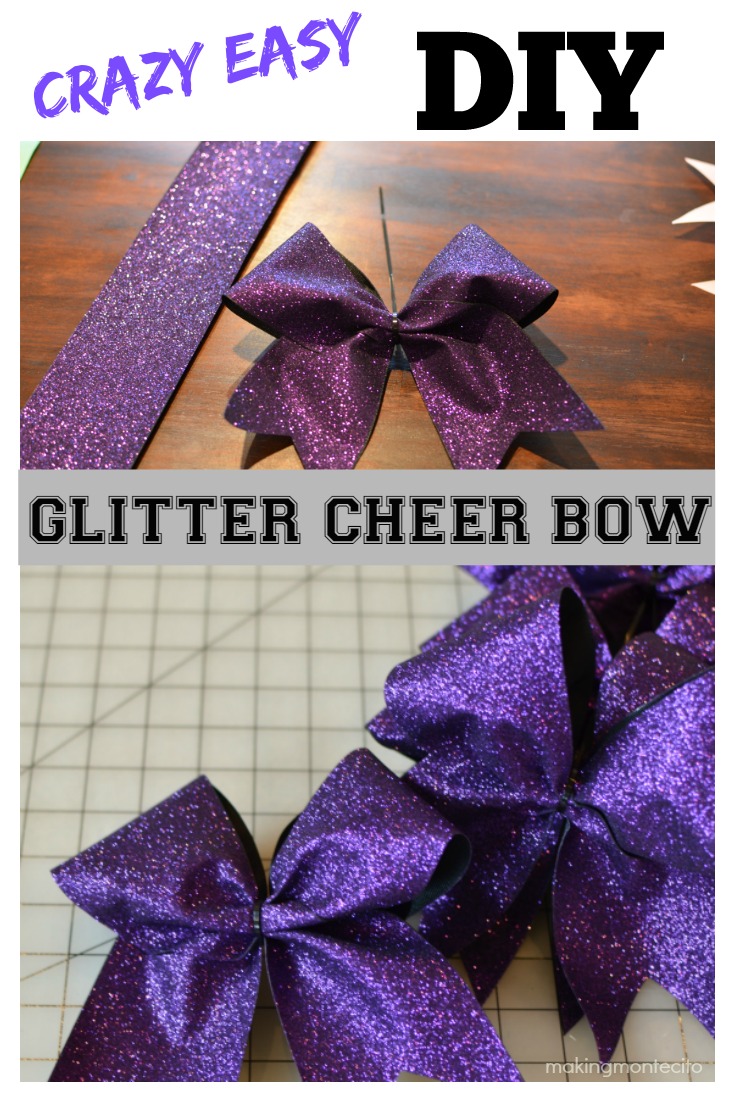
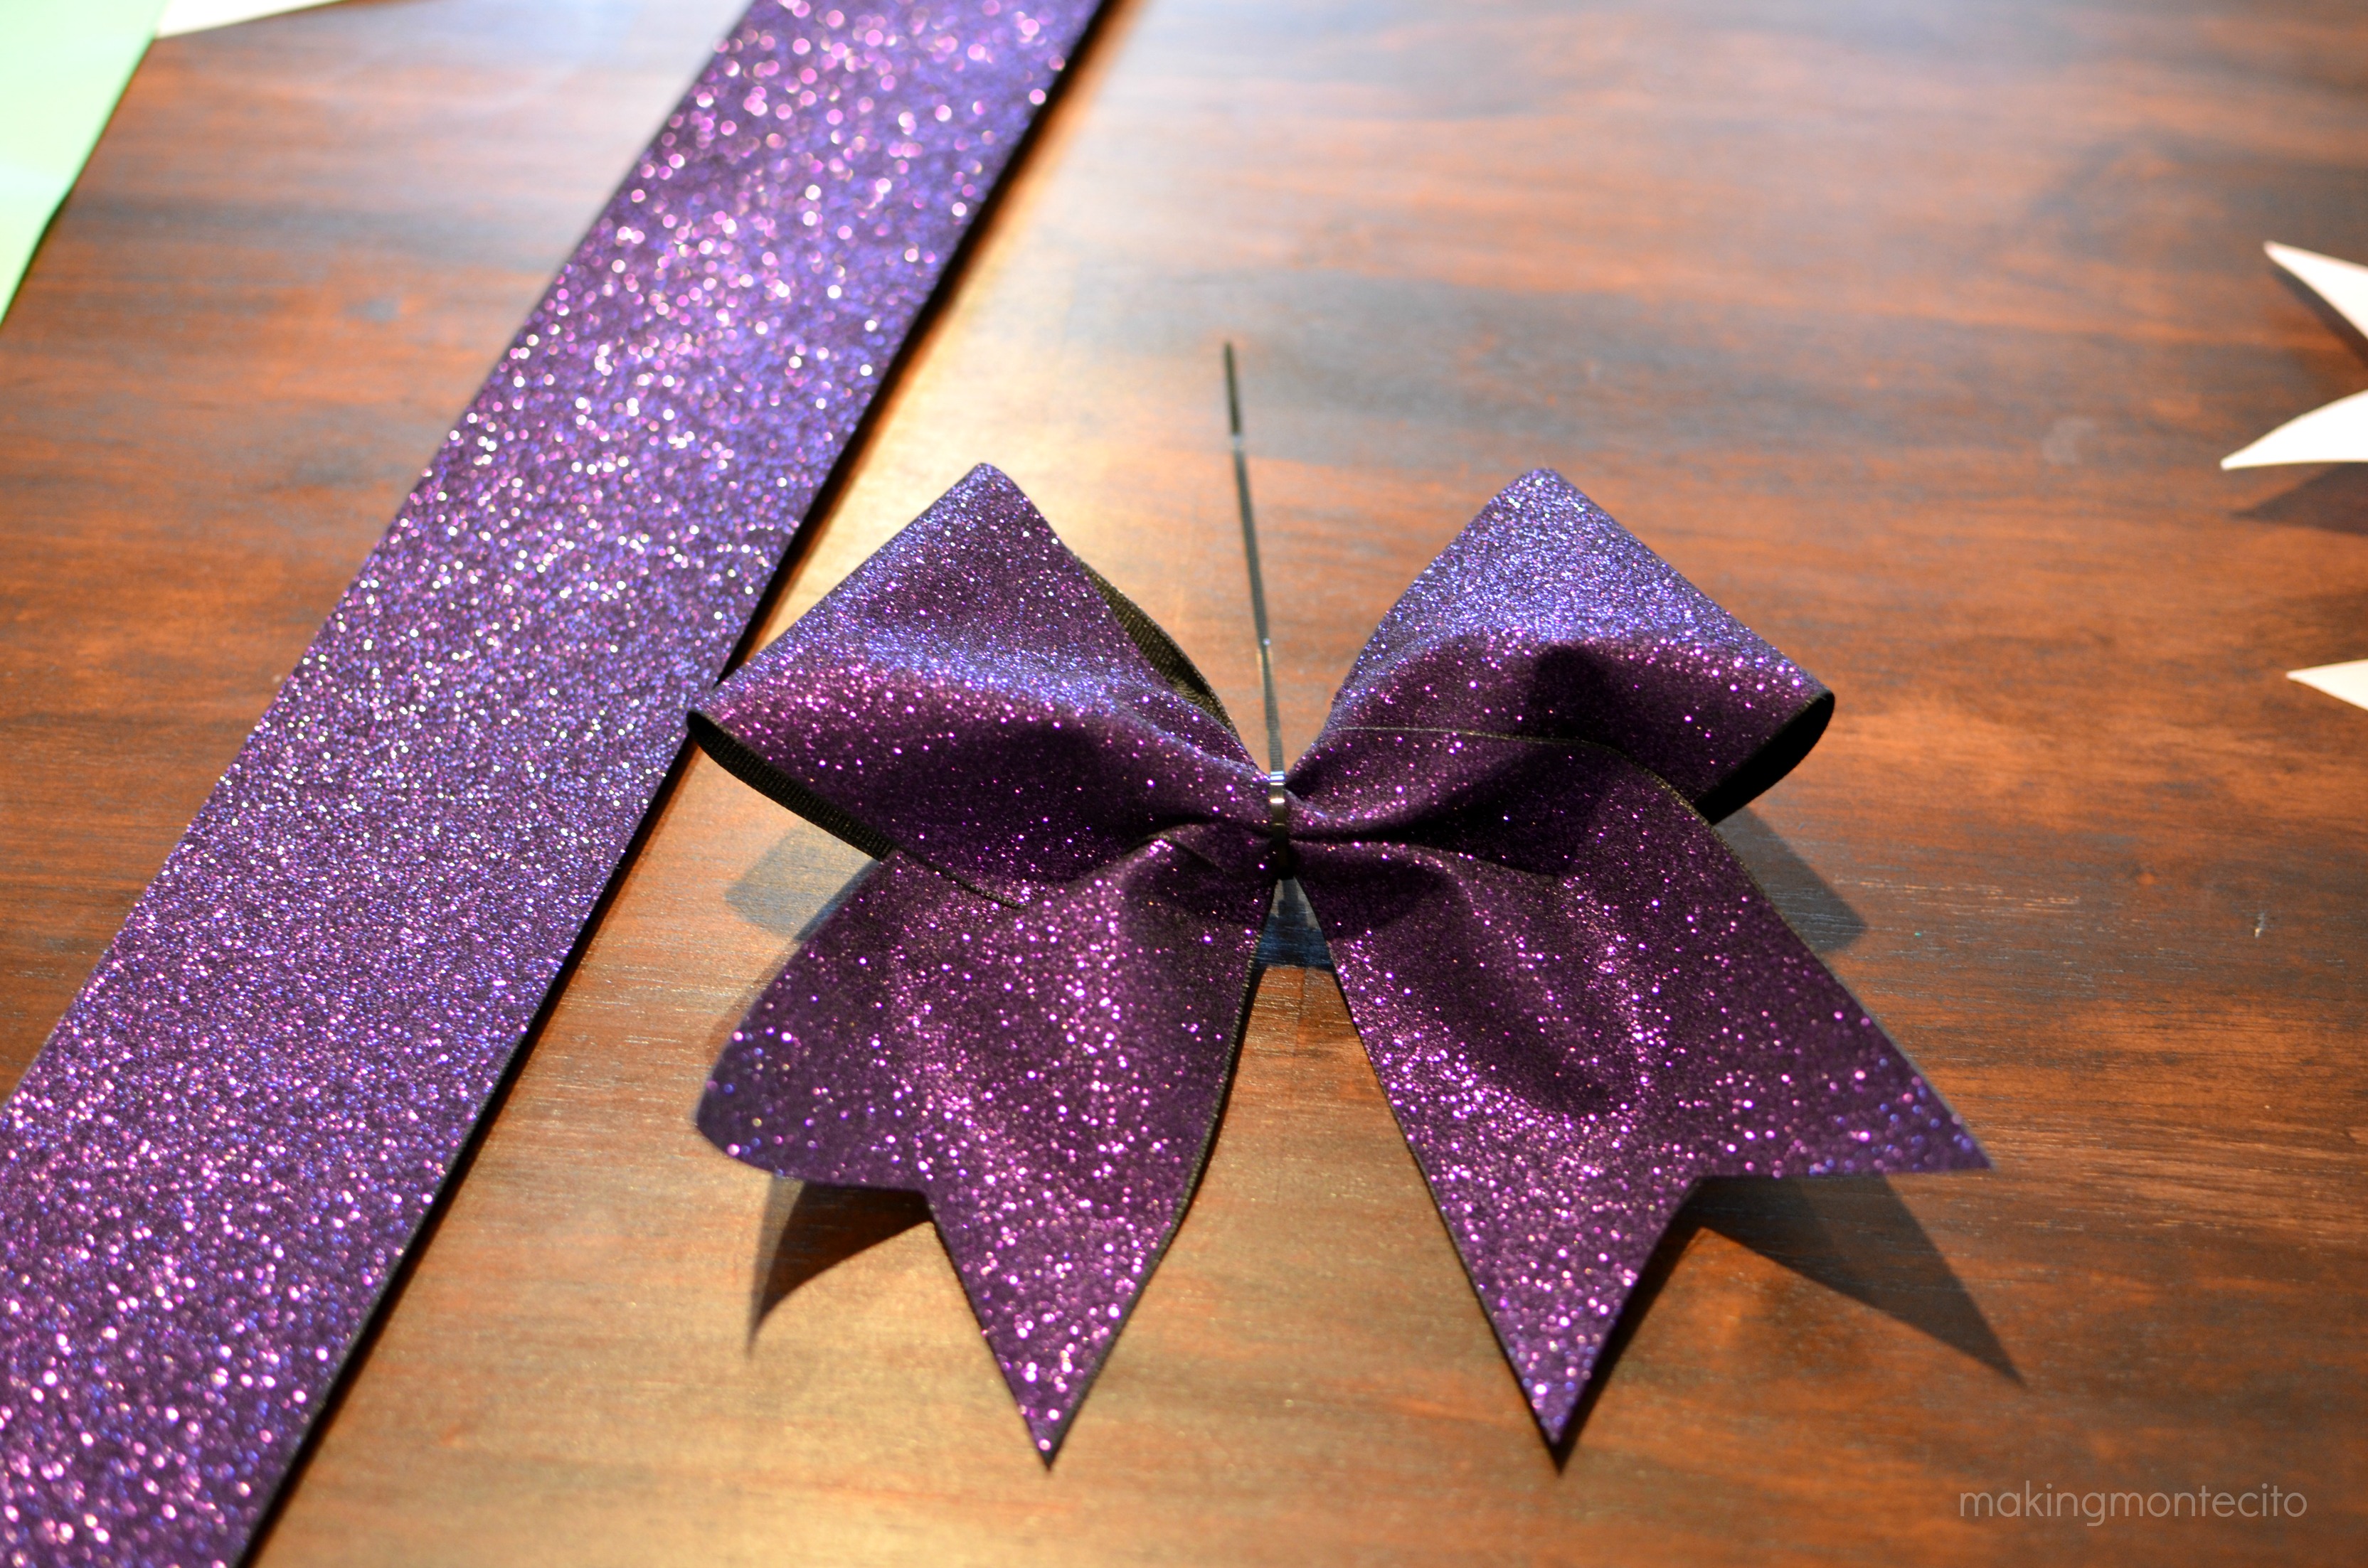
I think this is one of my favorite bow I made. It’s so stinkin’ simple, but oh so gorgeous. Seriously, the pictures do not do it justice.
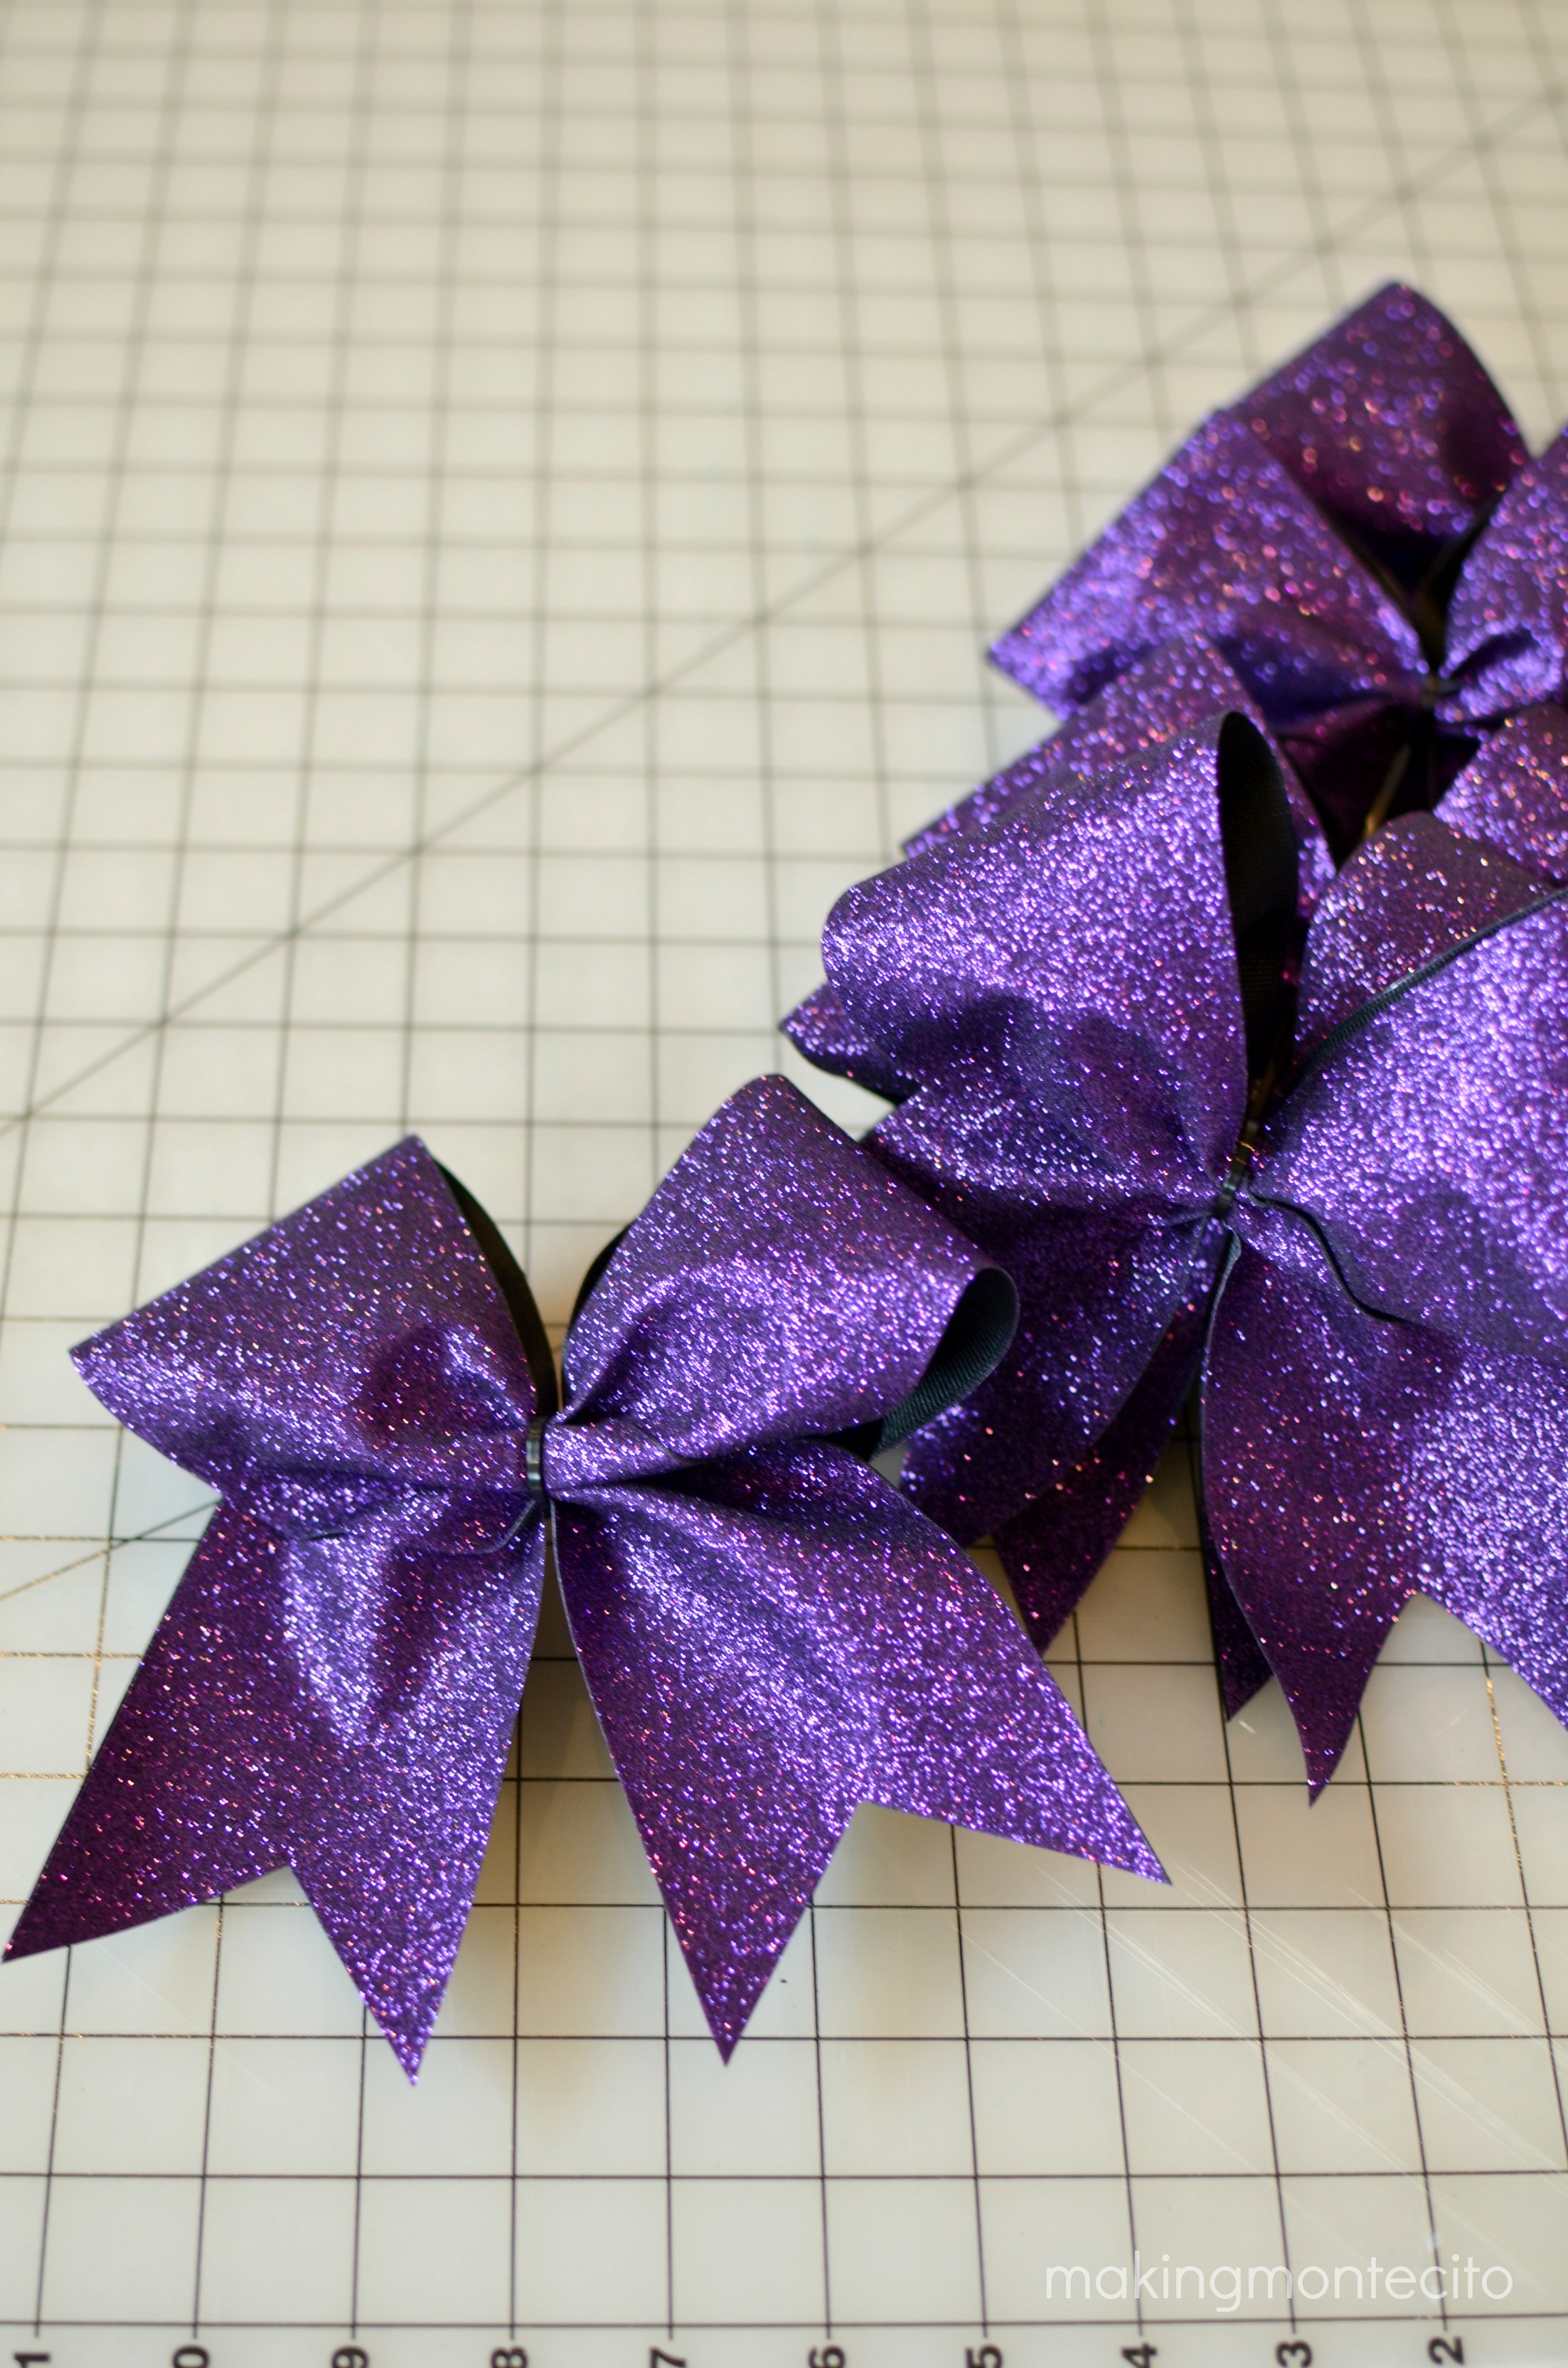
Just so you know, it is very stiff! A helpful note, when you go to fold it in the bow shape, place parchment paper or a Teflon pressing sheet over it and heat it up briefly with your iron or heat press. It helps the folding process go much smoother. I also found that if I just squished and pinched and slowly pulled the zip tie snug, adjusting the loops and tails as I went, it made a nicely shaped bow. Don’t be discouraged if you have to cut the ziptie and start over.
Resources: (Some of these are affiliate links):
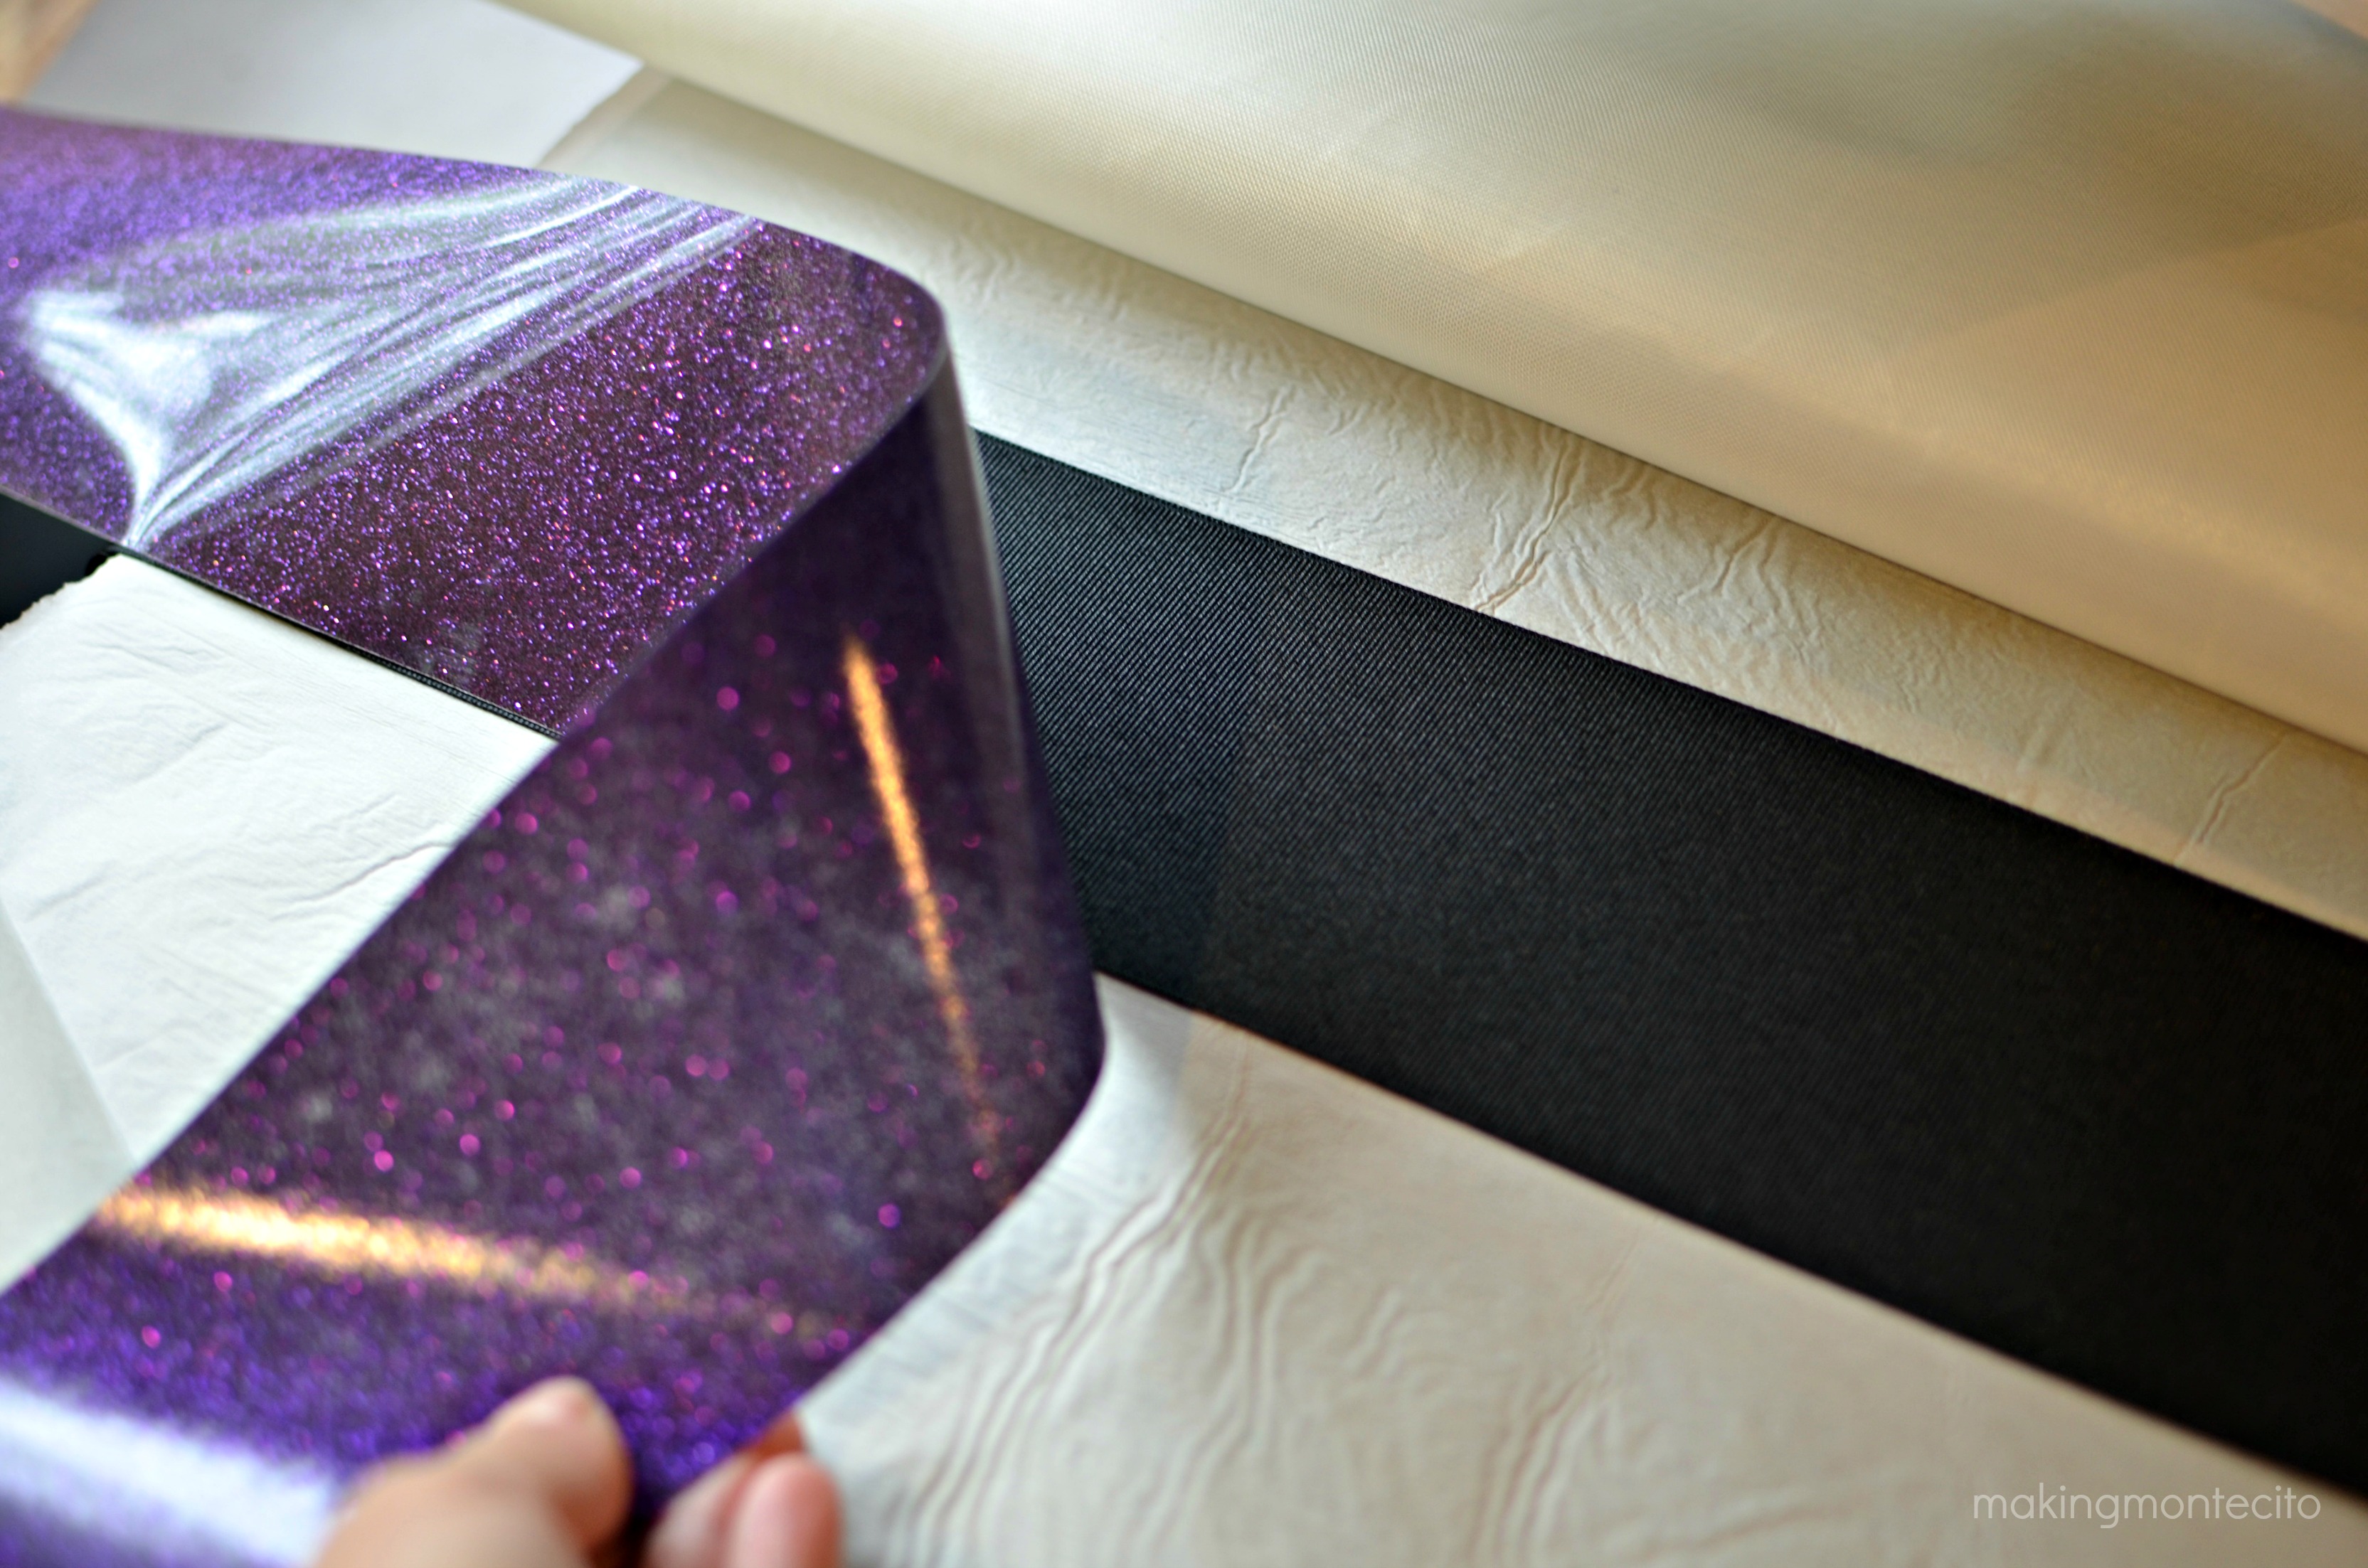
- Purple Glitter Strips: Cheer Bow Supply – This comes in 3″ widths to just be able to press onto your backer ribbon. It was awesome.
- 3″ Black Grosgrain Ribbon: Amazon – Since we were making several bows using black ribbon, I bought a 50yd spool, but they seem to go on backorder quite a bit. This 10yd spool of 3″ grosgrain ribbon is in stock right now. Just look around on Amazon and price it out per yard to fit your needs. Cheer Bow Supply also has 3″ ribbon. I just happened to find mine cheaper on Amazon at the time. (Note…this is pronounced “Grow-grain” I’ve heard several tutorials calling it “gross” or ”gros” grain. Not being snobbish – just thought I’d let you know if you needed to ask someone in a store for it.)
- Zipties: Amazon –200 CableTies Combo Pack White & Black
- Black 3/8″ Center Ribbon: Hobby Lobby, Michael’s, Jo-Ann all carry it. I think I got mine at Michael’s on sale for $1.00 I pressed the purple glitter onto a 3/8″ black ribbon to keep the purple sparkle consistent.
- Elastics: Walmart
Directions:
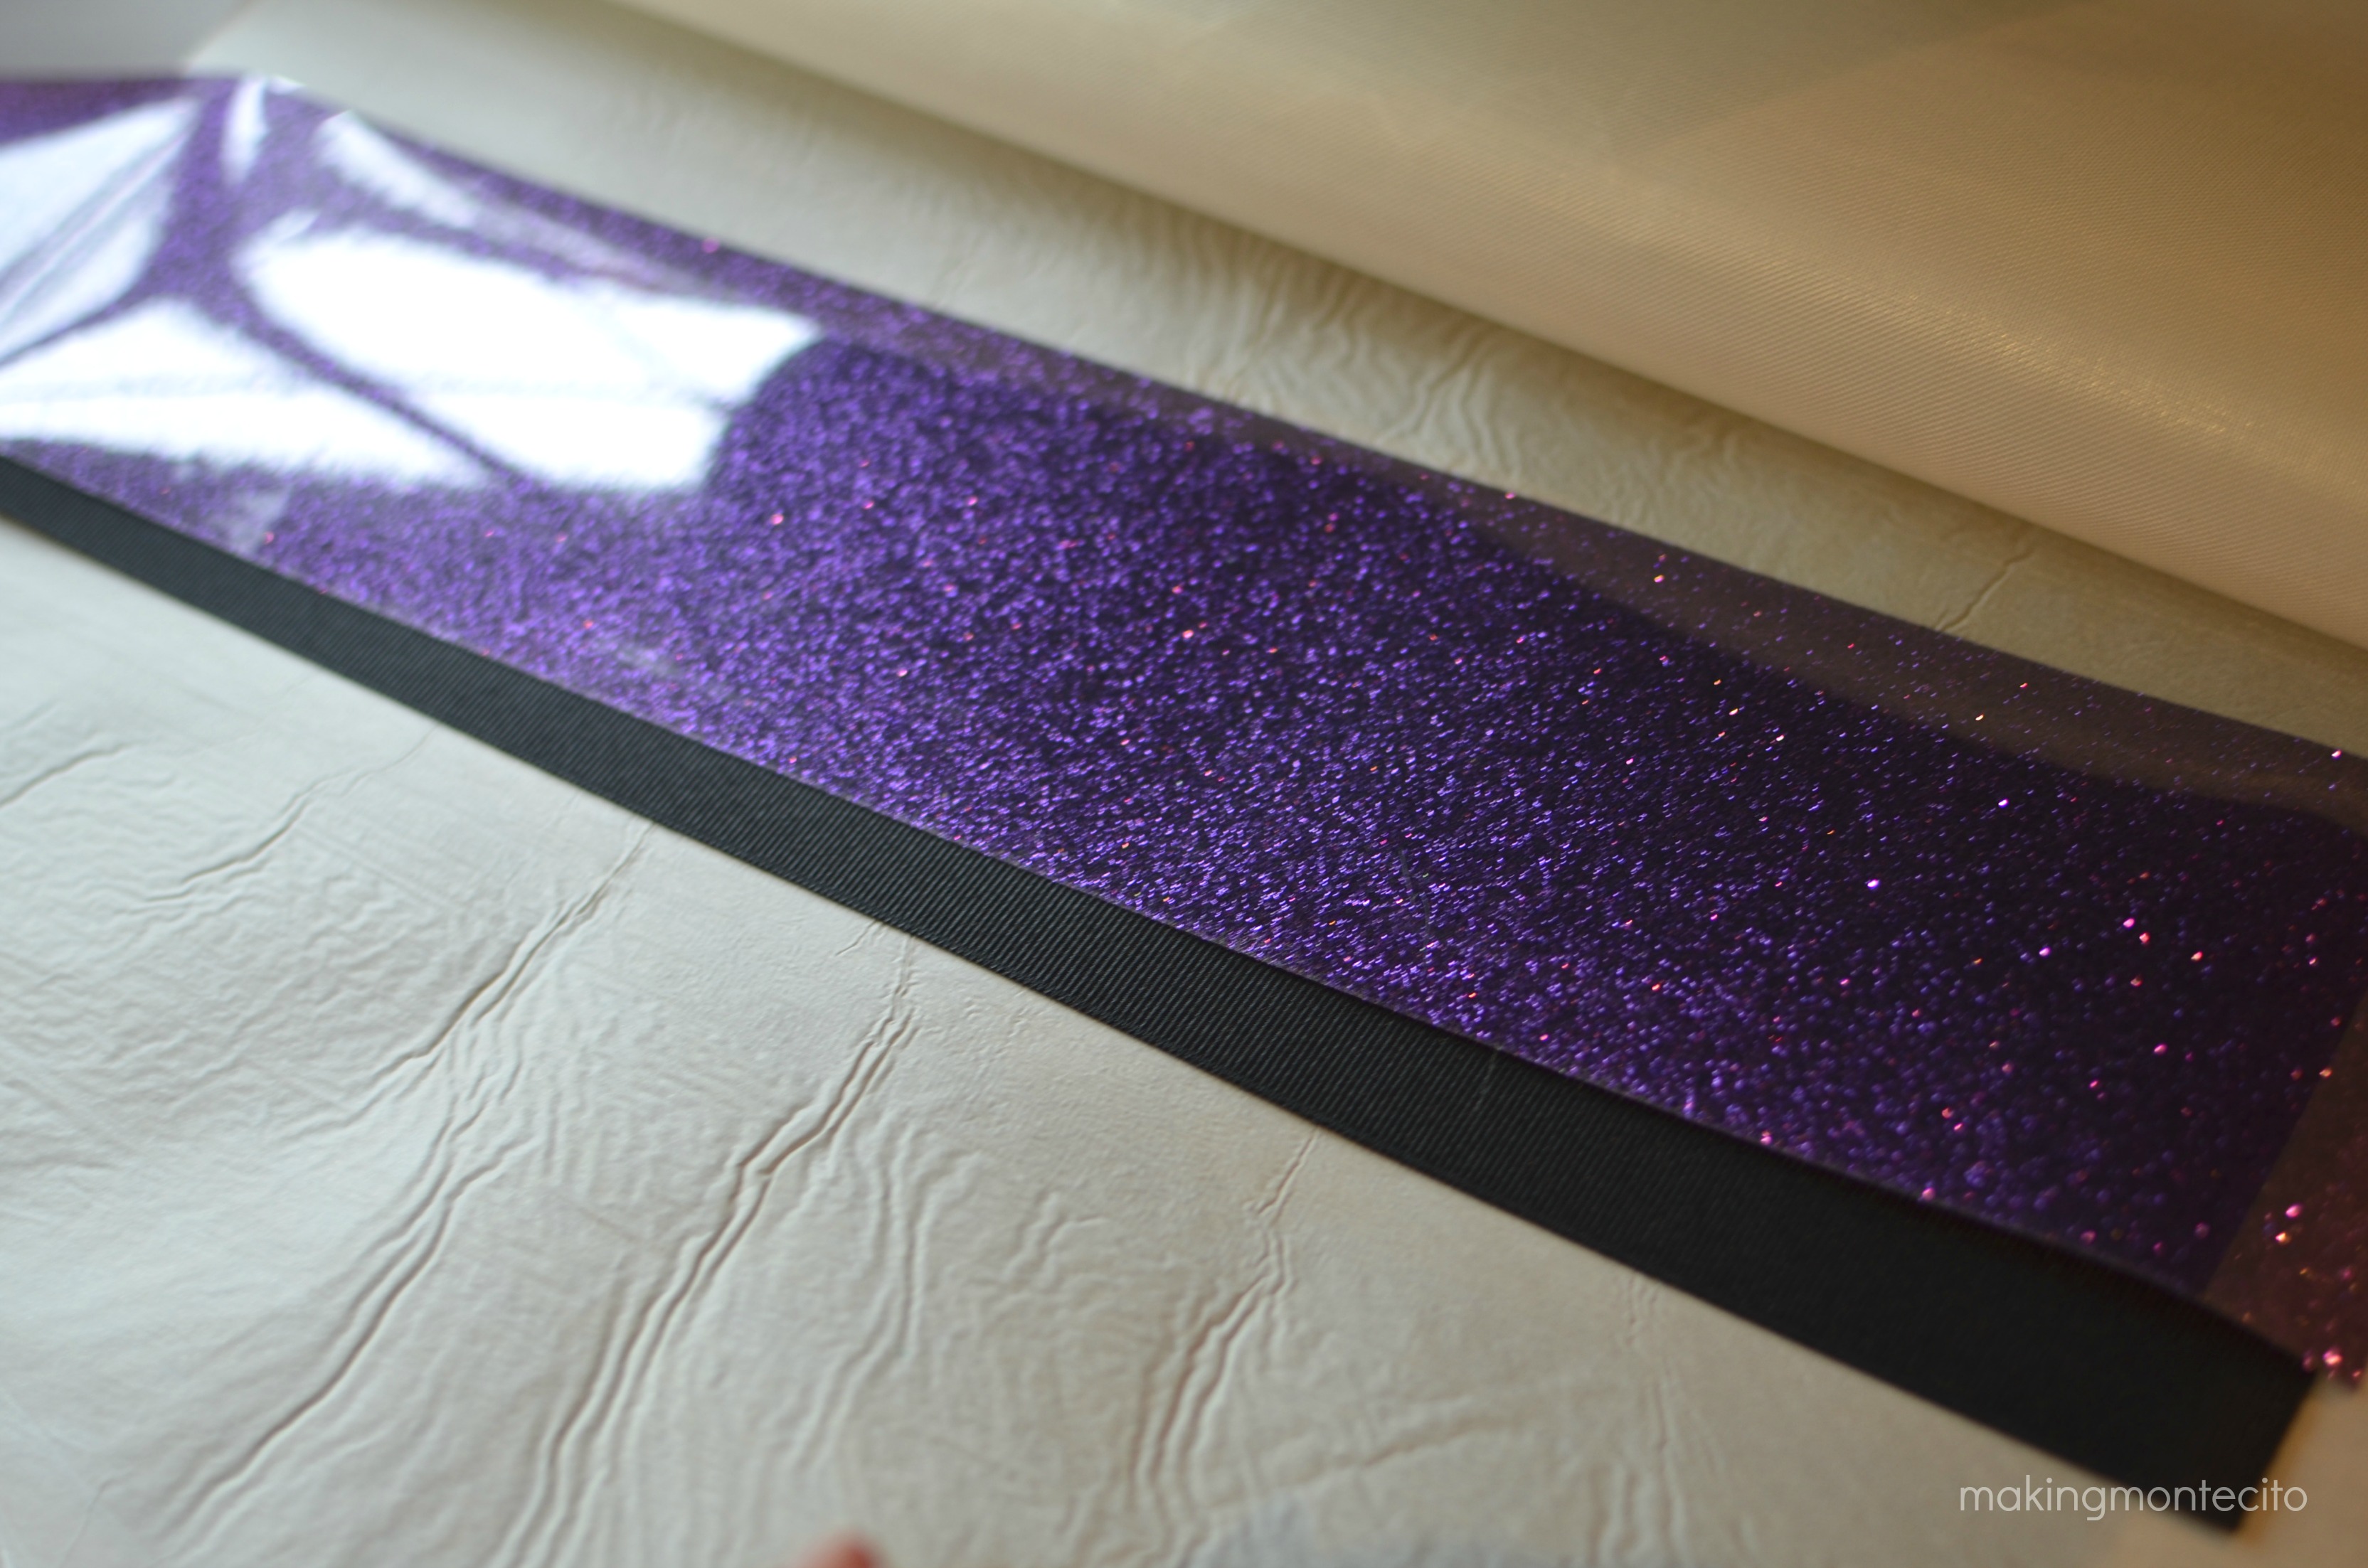
Cut your 3″ ribbon to 28″ lengths for each bow you’ll be making.
Cut your 3″ glitter vinyl to 28″ lengths to match the ribbon.
 Simply lay the 3″ glitter vinyl over the 3″ black ribbon and press (I covered it with parchment paper to protect it.)
See how they’re already the same size? No trimming afterward!
I used my heat press for this and was able to do it half a bow section at a time. It was so crazy easy. Then peel off the top plastic carrier for the glitter while it’s still warm. (Cheer Bow Supply has several DIY videos if it still seems confusing.)
Use the paper template you can print out from here and fold your bow. This just takes patience. Here’s a video from Cheer Bow Supply.
It’s basically just making a “ribbon remembrance loop” (think cancer ribbon shape) and scrunching the middle and pinching and tugging and pulling on the loops and tails as you tighten the ziptie. Don’t pull the ziptie completely tight at first. Leave it a little loose to be able to adjust it here and there. And if you need to, cut the ziptie, warm your ribbon back up and start over. 🙂 Warming the glitter ribbon for a few seconds with the iron or heat press will make it more pliable and easier to work with.
They are just so pretty! I tell my friends, it’s a good thing I’m not a fish…I’m attracted to sparkly things.
After you fold your bow on the template and ziptie it for good. Use some hot glue and glue on your hair elastic. I did not put the elastic in the ziptie as it can cause it to wear at that point and break.
After the glue dried, I took a small length of 3/8″ ribbon and hot glued it around the middle of the bow (beginning and ending in the back.) I don’t have a picture of it, but I took the middle 3/8″ grosgrain ribbon and pressed some of this purple glitter onto it and trimmed it to size for the middle ribbon, so it would stay monochromatic.
I folded over the bottom edge and used a straight edge and rotary cutter to cut the fish-tail ends. Like this (about half way down the page.) I can’t always be trusted with scissors.
I then carefully ran a lighter along the edge to heat seal it and keep it from fraying.